
Hello! It's me Christine, again!
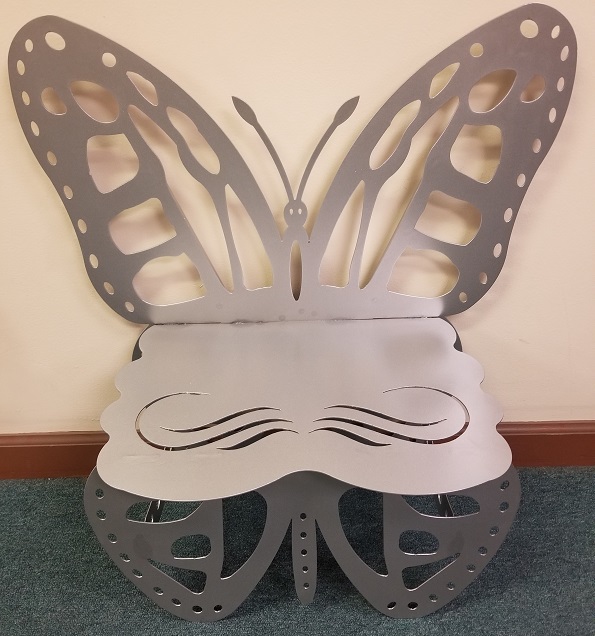
This past week here at JD Squared, I made this adorable butterfly chair. The free .SVG files were found at Plasma Spider. As a side note, most projects posted will be entirely designed by moi. However, after my wreath, I was briming with excitment, ready to tackle another project. But I had the realization that I've never designed anything, let alone a chair. So I thought, let's just do this and see what we get! I learned a lot, including how to MIG weld! How wild is that!?
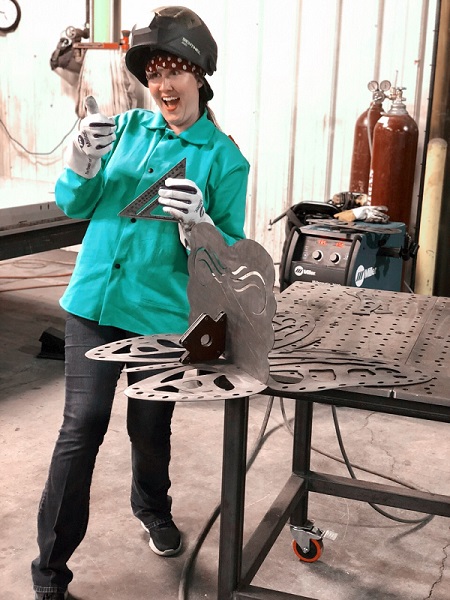
Check me out! I look so cool!
Quick Project Details
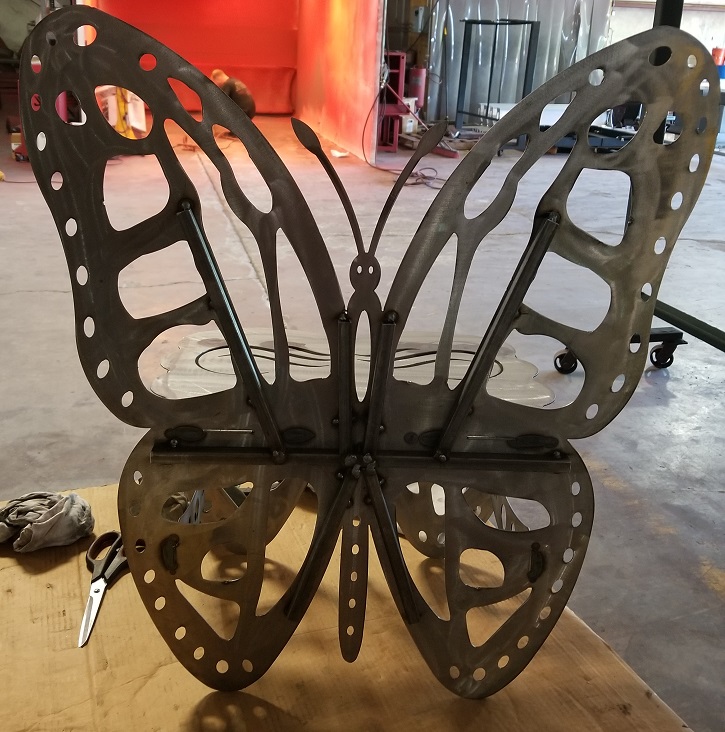
The butterfly design was chosen and the files were downloaded. We had some odds and ends of 16 ga steel (0.598 inches). Accordingly, each piece was individually saved as a job in SheetCam. If we were making multiple chairs, we probably would've nested the pieces. It was cut on our in-house JD Squared, Inc. MAD 4' X 4' CNC Plasma Table. I welded the chair together. The back was flimsy but remedied by tacking 1/2" box tubing to the back.
Welding 101
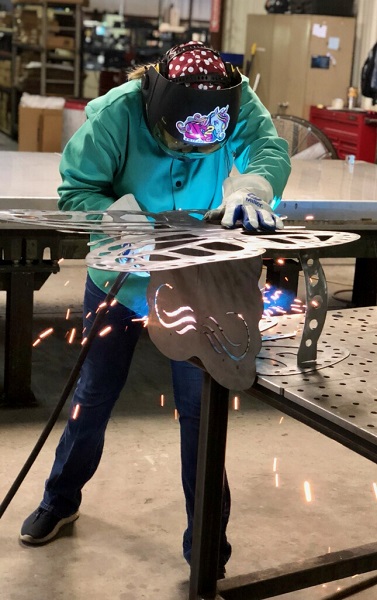
For a novice, metal inert gas welding, or MIG welding, is a good place to start. The guys swore I'd be welding in 20 minutes. To my surprise, they were correct!
Welding Safety
In any new endeavour, it's really important to start off with a bang, but more importantly, a safe bang. Rule number 1: Don't catch on fire. That implied purchasing a special fire retardant jacket in a snazzy green. I initally brought with me an 100% cotton button up cardigan, which was quickly vetoed. I squawked at the jacket, which made me look like a big green box. It's not a flattering look, but it is 100% neccessary. It seems as though the MIG welder wants to catch you on fire!
Jacket- check! Helmet- check! I chose the ESAB Sentinel A 50. It fit really well and it was on sale, so double win! I found a red polka dot cap to protect my hair, but it was way too big and I ended up fumbling with it the entire day. The MIG gloves in the store came in either Large or XL. Both sizes were too big. The local guys at Air Gas are really nice and I'm sure if I were a dedicated welder they'd stock a smaller size for me. This time it was just as easy to go online and get them via MSC. However, the video footage will show me wearing the large MIG gloves and awkwardly trying to pick up pieces of steel. You are welcome for the giggles.
To recap recommended welding attire:
- Welding helmet
- MIG gloves
- Cap
- Fire retardant jacket
- Pants and closed-toed shoes
I must have picked the hottest day to learn how to weld. Our awesome welders showed me the basics and set me up with practice material. I would have never imagined that I'd have the chance to do something like this, but I kid you not, it was a lot of fun. It's hot wearing all that stuff and a little dirty, but the sparks flying are just too cool. The feeling of seeing it all finished and knowing that I made it was incredibly cool.
In my few hours of welding this is what I've learned:
- Don't be afraid of the sparks if you're wearing all your protective gear. That being said, don't forget to tune your helmet. Not too dark, not too bright.
- Bacon. It'll sound like you are sizzling bacon.
- Take it off of grind mode when welding or you'll be seeing shadows and shapes for a few minutes. It's what I'd imagine a real life getting bonked by Tweety bird and seeing stars would be like.
- Getting the right angle of the torch is very important. Make sure not to angle towards one side too much. Right in the middle of the two pieces is the sweet spot.
- Practice cursive E's. Girls usually have pretty handwriting and increased dexterity, so we're made to weld beautifully!
- For me at least, the puddle that moves more quickly produced a much prettier weld. My first welds were really thick for 16 ga steel.
- Those jerks increased the speed on me without my knowing and, go figure, it produced a much better weld. I was told that beginner welds either weld too quickly or too slowly.
- Welds are strong. Even my beginner welds were very strong. My hubs stood on that tiny chair and it didn't break! It was incredible!
- Change it up if it's not working. For me, I was trying to use my left hand as a stabilizer, but when I placed the torch between my pointer finger and my middle finger, my welds looked better.
Final Thoughts
This chair was easy to cut on the MAD CNC Plasma Table and it looked so cute. Once assembled, I realized that the back was far too flimsy to feel comfortable sitting down. In an effort to correct my mistakes, I spoke to my hubs, the engineer. We had a nice discussion regarding the pros and cons of that particular design.
Solution 1: Change material/thickness. Make the chair out of heavier steel or even aluminum. A thicker piece of steel, though not adding too much to the cost, would have added significatly to the weight of the chair. I decided, no, I don't want to haul around a heavy kid's outdoor chair. Aluminum could be used and the chair would be light and strong, but at a cost of six times more, it just didn't seem worthwhile.
Solution 2: Reinforce. Considering the fact that this was my first chair and gosh darn it if anyone suggested tossing it to recycling- I decided to try to reinforce the top. I could've cut out rectangular pieces on the CNC Plasma Table and bent them. The finished product would look like a triangular rib down the back of the chair. However, doing so, I couldn't title the blog, "No Press Brake, No Problems!" Another option, just as easy, would be to create bracing from the top corners of the chair down to the seat. It could look more regal. Not a bad option, but it would take away from the seating real estate. I know for a fact that two little girls will want to sit on it at the same time. I opted to cut some square box tubing and tack it to the back of the chair.
The sizing is as follows:
- The long strip in the middle is 16" long
- The bottom pieces are 7" long
- The top outer pieces are 10" long
- The top inner pieces are 5-1/4" long
Ta-da! A chair that can be used to hold my kids or a planter of fragrant flowers!
Send me your projects at: WomenThatFab@jd2.com.
Instagram us:
#wtfjd2